What happens at a 3D printing service provider between your order and receiving your 3D printed part? The following overview shows you the necessary steps involved in producing your parts at 3Faktur using the Multi Jet Fusion printing process (standard and full-color), as an example.
1. Check for 3D printability
After you have submitted your 3D model to us – via the online form on our website or as a PDF – (for full-color 3D printing, we also need the texture or color information (possible file formats: 3MF/OBJ/WRL)), we check its 3D printability. We pay particular attention to sufficient wall thickness, adequately sized openings for cavities, and minimum diameters for channels. Additionally, we verify critical elements such as sharp edges or delicate structures that could potentially affect the functionality and quality of the part. We utilize various software programs and, most importantly, the vast experience of our engineers, who check several hundred 3D models daily. Upon completion of the printability check, you will receive an order confirmation from us.

2. 3D print preparation
After the printability check, the 3D model is placed in a kind of “queue” for 3D printing. For the Multi Jet Fusion printing process, the following data is added to the model: colors, quantity, and essential printing parameters, such as the orientation of the part during printing.
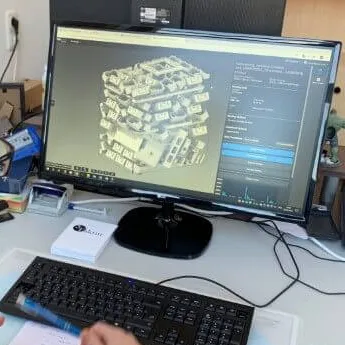
Once the optimal number of parts has accumulated in the “queue,” the “packing” process begins. During this step, the positions of the objects relative to each other are determined, and the build chamber is “packed” accordingly. An even “part mix” is essential for the quality and cost-effectiveness of production.
A fully packed build chamber, containing all the data about the parts and their positions within the chamber, is referred to as a “build job” or simply a “job.” The data from the build job is then transferred to the 3D printer.
3. 3D printing
Before the printer begins the actual printing process, there is a preparation period of approximately 45 minutes, during which various self-tests are performed, and the build chamber is heated to above 160°C. Subsequently, the printing process takes about 16 to 17 hours. For full-color 3D printing, the printing and cooling times are shorter due to the smaller build chamber.
After the 3D printing is completed, the build chamber is removed for cooling. We allow the chamber to cool slowly over two days, which positively affects the surface quality and tolerances and reduces warping of the parts. Rapid cooling would lead to increased material stress and could adversely affect the quality of the objects.

4. Cleaning of the parts
After cooling, the 3D printed parts are inside the build chamber, surrounded by loose powder. When removed from the powder bed, the remaining powder is removed and returned to the material supply. Cleaning is done manually using a vacuum cleaner and various brushes.
Subsequently, the parts undergo glass bead blasting. This process is essential for removing stubborn powder residues. An air jet alone is usually insufficient. The glass bead blasting is only slightly abrasive and densifies the surfaces of the parts. The edges and corners of the objects are hardly rounded during this process. The used blasting material is collected separately and can be reused.


5. Post-processing
In principle, the parts are ready after step 4. However, many customers choose one of our post-processing options. The corresponding parts are identified and assigned to the appropriate finishing methods. The processing is then carried out according to the chosen finishing method.
For more information about the post-processing methods, please visit our website: Finishing options for PA 12

6. Sorting & quality control
In the end, all parts must be sorted according to the orders. Typically, one build chamber contains 50 to 250, sometimes even over 1,000 objects.
Assigning the parts to the corresponding orders is a time-consuming task. We use a production management software that holds all information about the produced parts. This is also the point at which we recheck whether the printed objects meet the customer’s requirements and our quality standards.

7. Packaging & shipping
In the final step, the parts are packed and made ready for shipping, and they are handed over to the shipping service provider (usually DHL).
Under normal production processes, including cooling and post-processing, we require 3.5 days from the time of order receipt until the 3D printed parts are ready. Our standard delivery time is 7 days. For full-color 3D printing, the standard delivery time is also 7 working days, but express delivery is possible within 2 working days.
About 3Faktur: 3Faktur specializes in 3D printing, rapid prototyping, and rapid manufacturing. We utilize HP’s Multi Jet Fusion technology and offer various materials for prototyping and series production. If you have any questions about your project, feel free to contact us.
